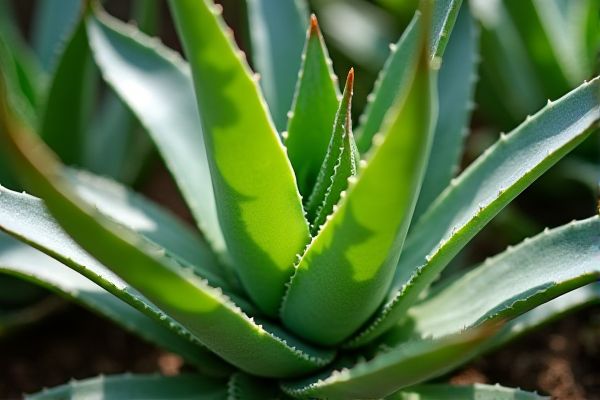
Aloe vera thrives in conditions that balance sunlight and shade, making partial shade an ideal environment for its growth. This succulent requires well-drained soil and moderate watering to prevent root rot, especially when grown in less direct sunlight. Your aloe vera plant benefits from protection against intense afternoon sun, which can cause leaf scorching, while still receiving enough light to promote healthy photosynthesis. Understanding these care essentials ensures your aloe vera remains vibrant and robust in partial shade settings.
Why Choose Partial Shade for Aloe Vera Planting
Aloe vera thrives in partial shade because it receives filtered sunlight, which prevents leaf scorching common in direct, intense sun exposure. Your aloe plant benefits from reduced heat stress and consistent moisture retention in shaded environments. Partial shade mimics Aloe vera's natural habitat, promoting healthy growth and vibrant leaf color. This environment supports optimal photosynthesis without risking damage from excessive UV rays.
Selecting the Best Aloe Vera Variety for Shaded Spots
Choose Aloe barbadensis Miller, a variety well-suited for partial shade due to its resilience and high gel content. This variety thrives in less intense sunlight, maintaining its growth and medicinal properties efficiently. For your shaded garden areas, Aloe barbadensis Miller ensures optimal health and vibrant leaves without requiring direct sun exposure. Your Aloe vera plant will benefit from this selection, providing both aesthetic appeal and practical uses.
Ideal Soil Mix for Aloe Vera in Low Light
Aloe vera thrives best in a well-draining soil mix when planted in partial shade. A combination of cactus potting soil and perlite or pumice ensures adequate aeration and prevents root rot. Incorporating organic compost can enhance nutrient availability without retaining excess moisture. Adjust your soil mix to maintain balance, supporting healthy root development and vibrant foliage in low light conditions.
Proper Pot Selection and Drainage Essentials
Choose a pot with ample drainage holes to prevent waterlogging and root rot when planting Aloe vera in partial shade. Use a well-draining cactus or succulent soil mix to ensure excess water escapes easily, maintaining ideal moisture levels. Your Aloe vera thrives best in a container that allows air circulation and avoids stagnant water conditions. Selecting the right pot and ensuring effective drainage supports healthy root development and overall plant vitality.
Step-by-Step Guide: Planting Aloe Vera in Partial Shade
Aloe vera thrives in partial shade by receiving indirect sunlight for at least 4 to 6 hours daily, which prevents leaf scorching while promoting healthy growth. Use well-draining soil mixed with sand or perlite to avoid water retention that can cause root rot. When planting, place the aloe vera in a pot or garden spot that ensures good air circulation and water sparingly, allowing the soil to dry out completely between watering. Your aloe vera will adapt well to these conditions, providing you with a hardy, low-maintenance succulent.
Watering Guidelines for Shaded Aloe Vera Plants
Aloe vera plants growing in partial shade require careful watering to prevent root rot and overwatering. Water your aloe vera only when the soil is completely dry, typically every 3 to 4 weeks, as shaded conditions reduce evaporation. Use well-draining soil and pots with drainage holes to help excess water escape efficiently. Monitoring soil moisture regularly ensures your aloe stays healthy and thrives even with less sunlight.
Light Requirements: Balancing Sun and Shade
Aloe vera thrives best in partial shade where it receives about 4 to 6 hours of indirect sunlight daily. Direct sunlight can cause the leaves to turn brown or yellow, indicating sunburn stress. Your plant will benefit from a well-draining soil mix to prevent root rot, especially in lower light conditions. Monitoring moisture levels ensures the Aloe vera remains healthy and vibrant.
Common Pests and Diseases in Shaded Environments
Aloe vera plants grown in partial shade are susceptible to pests such as mealybugs and spider mites, which thrive in humid, low-light conditions. Fungal infections like root rot and leaf spot frequently occur due to excess moisture and poor air circulation in shaded areas. You should regularly inspect your aloe vera to detect early signs of infestation or disease and maintain proper drainage to prevent root damage. Implementing natural pest control methods and ensuring moderate watering will help keep your plant healthy in partial shade environments.
Best Fertilizers for Aloe Vera Grown in Partial Shade
Aloe vera thrives with a balanced fertilizer that contains nitrogen, phosphorus, and potassium in a 10-10-10 or 15-15-15 ratio, especially when grown in partial shade. Using organic fertilizers like compost or worm castings enhances soil health and supports steady growth without over-fertilizing. Slow-release granular fertilizers applied once every three months help maintain nutrient availability without causing root burn. Ensure you monitor your aloe vera's growth and adjust fertilization based on its leaf color and firmness for optimal results in partial shade.
Pruning and Maintaining Healthy Aloe Leaves
Pruning your Aloe vera in partial shade helps promote healthy growth by removing damaged or diseased leaves, allowing more energy to be directed toward new shoots. Trim leaves at the base using clean, sharp scissors to prevent infections and ensure proper healing. Regularly inspect the plant for signs of pests or fungal infections, which are more common in shaded, humid environments. Maintaining optimal airflow around the aloe also reduces the risk of rot and supports vibrant, sturdy foliage.
Managing Humidity and Airflow for Optimal Growth
Aloe vera thrives in partial shade environments where humidity levels range between 40% and 50%, preventing fungal infections and leaf rot. Ensure proper airflow around your plant by spacing it adequately from other vegetation, which helps reduce moisture buildup and promotes healthy respiration. Avoid overwatering, as excess moisture combined with high humidity can create unfavorable conditions for your aloe vera. Monitoring these factors carefully supports vigorous growth and maximum medicinal benefits.
Signs Your Aloe Vera Needs More Sun
Aloe vera plants grown in partial shade may exhibit elongated, pale leaves indicating insufficient sunlight. The leaves might also become soft or weak, lacking the firm, fleshy texture typical of a healthy plant. You can observe slow growth rates and reduced leaf development as clear signs your aloe vera needs more sun exposure. Adjusting its location to receive indirect, bright light for several hours daily will help restore its vitality.
Transplanting Aloe Vera: When and How
Transplant Aloe vera during early spring or late summer to ensure optimal growth in partial shade conditions. Choose a well-draining soil mix rich in sand and organic matter to prevent root rot. Your plant should be gently removed from its current pot, preserving the root ball, and placed in a slightly larger container with fresh soil. Water sparingly after transplanting, allowing the soil to dry out between watering to mimic Aloe vera's natural arid habitat.
Seasonal Care Tips for Shade-Grown Aloe Vera
Aloe vera thrives in partial shade, especially during the hot summer months when direct sunlight can scorch its leaves. Your shade-grown aloe benefits from well-draining soil and minimal watering, as overwatering can cause root rot. During cooler seasons, reduce watering frequency to prevent excess moisture buildup. Regularly check for pests like aphids and mealybugs to maintain plant health.
Harvesting Aloe Vera Gel: Techniques for Shaded Plants
Harvest Aloe Vera gel from leaves grown in partial shade by selecting mature, thick leaves near the base of the plant for maximum gel content. Use a sharp, clean knife to cut the leaf close to the stem, then wash the leaf thoroughly to remove dirt and debris. Slice open the leaf lengthwise and carefully scoop out the clear gel using a spoon or your fingers, avoiding the yellow latex layer that can cause irritation. Store the extracted gel in an airtight container in the refrigerator to maintain freshness and potency for your skincare or medicinal needs.