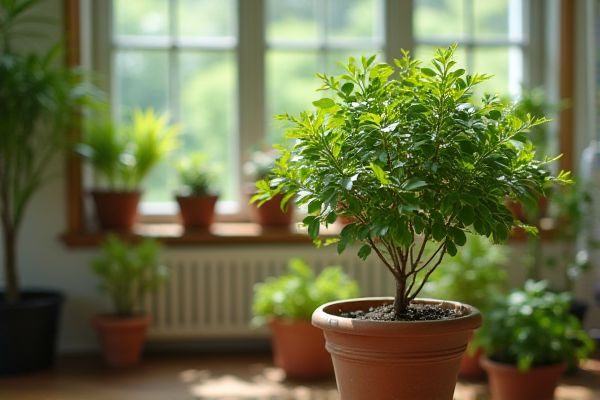
Growing Bay Laurel in clay pots indoors offers a practical solution for gardeners seeking fresh, aromatic leaves year-round. Clay pots provide excellent drainage and breathability, which are essential for Bay Laurel's root health. You can control moisture levels more effectively, preventing root rot often caused by overwatering in less porous containers. Indoor cultivation also protects the plant from harsh weather, ensuring steady growth and vibrant foliage.
Choosing the Right Bay Laurel Variety for Indoor Growing
Selecting a compact Bay Laurel variety such as 'Nana' or 'Compacta' suits indoor cultivation in clay pots due to their smaller size and slower growth. These varieties adapt well to container environments, enabling healthier root development and easier maintenance. Your clay pot should have sufficient drainage to prevent waterlogging, which can harm the roots of Bay Laurel plants. Keeping the plant in bright, indirect light supports optimal growth and aromatic leaf production indoors.
Best Clay Pot Sizes and Drainage Considerations
For planting Bay Laurel indoors, selecting a clay pot between 12 to 16 inches in diameter ensures sufficient space for root growth and stability. Ensure the pot has drainage holes to prevent waterlogging, which can cause root rot and hinder plant health. Using a saucer to catch excess water helps maintain optimal moisture levels without damaging surfaces. Your Bay Laurel will thrive with proper drainage and an appropriately sized container that supports aeration and root development.
Selecting High-Quality Potting Soil for Bay Laurel
Choosing high-quality potting soil enriched with organic matter ensures optimal growth for your Bay Laurel in clay pots indoors. A well-draining mix that combines peat moss, perlite, and compost prevents waterlogging and root rot. The soil pH should be slightly acidic to neutral, around 6.0 to 7.0, to support nutrient uptake. Your Bay Laurel will thrive with proper soil that balances moisture retention and aeration.
Correct Planting Depth and Spacing in Pots
Plant your Bay Laurel in clay pots with a depth that accommodates the root ball plus an extra 2 inches to allow for root growth and proper drainage. Ensure the pot has drainage holes to prevent waterlogging, which can damage the roots. Space multiple Bay Laurel plants at least 6 to 8 inches apart in larger pots to allow adequate air circulation and growth. Your clay pots should be large enough to support healthy root expansion without crowding the plants.
Optimal Light Requirements for Indoor Bay Laurel
Bay Laurel thrives in bright, indirect sunlight when planted in clay pots indoors, requiring at least six hours of light daily to maintain healthy foliage. Position your plant near south- or west-facing windows to maximize exposure without causing leaf scorch from direct sun. If natural light is insufficient, supplement with full-spectrum grow lights to ensure consistent energy for photosynthesis. Proper lighting supports vigorous growth and enhances the aromatic quality of your indoor Bay Laurel.
Watering Schedule and Moisture Control Tips
Maintain consistent moisture levels for your Bay Laurel by watering when the top inch of soil feels dry to the touch. Overwatering can lead to root rot, so ensure proper drainage by using clay pots with drainage holes. Monitor humidity indoors by occasionally misting the leaves or placing a humidity tray nearby to mimic natural conditions. Your plant will thrive with balanced moisture and well-drained soil.
Humidity and Temperature Needs for Healthy Growth
Bay Laurel thrives indoors with humidity levels between 40-60%, which helps prevent leaf browning and promotes vibrant foliage. The ideal temperature range for healthy growth is 60-75degF (15-24degC), avoiding sudden drops below 50degF (10degC) to prevent stress. Placing your clay pot in a well-ventilated area with indirect sunlight supports optimal moisture retention and temperature stability. You can increase humidity by misting the leaves regularly or using a pebble tray with water beneath the pot.
Fertilizing Bay Laurel: Frequency and Formulas
Bay Laurel thrives indoors when fertilized every 4 to 6 weeks during the growing season, typically spring through early fall. Use a balanced, water-soluble fertilizer with an N-P-K ratio around 10-10-10 or 20-20-20 to support healthy foliage and root development. Slow-release fertilizers can be beneficial to maintain steady nutrient levels in clay pots, which tend to dry out quicker than other containers. Your Bay Laurel will benefit from regular feeding, especially if repoted or showing signs of nutrient deficiency such as yellowing leaves.
Pruning Techniques for Shape and Health
Regular pruning of Bay Laurel in clay pots indoors promotes healthy growth and maintains its desired shape. Focus on trimming new shoots back to a pair of leaves to encourage bushier foliage and prevent legginess. Remove any dead or yellowing leaves promptly to improve air circulation and reduce disease risk. Your consistent pruning routine will result in a vibrant, well-structured Bay Laurel plant.
Monitoring for Pests and Disease Indoors
Bay Laurel planted in clay pots indoors requires regular monitoring to prevent pest infestations and disease. You should check the leaves frequently for signs of scale, aphids, or fungal infections that can thrive in indoor environments. Maintain good air circulation around the plant and avoid overwatering to reduce the risk of root rot and mildew. Early detection and treatment with insecticidal soap or neem oil can help keep your Bay Laurel healthy.
Transplanting Young Bay Laurel Plants Properly
Transplant young Bay Laurel plants into clay pots with well-draining soil to prevent root rot and promote healthy growth. Your Bay Laurel requires pots with drainage holes to avoid water accumulation that can damage roots. Choose a pot size that allows the plant's roots to expand comfortably without being root-bound. Ensure the soil mixture includes organic matter for nutrient retention and moisture control, supporting vigorous indoor growth.
Supporting Root Development in Clay Pots
Clay pots provide excellent aeration, which promotes healthy root development for Bay Laurel. To support root growth indoors, ensure the pot has adequate drainage holes to prevent waterlogging and root rot. Use a well-draining, nutrient-rich soil mix tailored for container plants to optimize nutrient uptake. Your Bay Laurel will thrive when roots have space to expand and access oxygen efficiently.
Seasonal Care: Wintering and Adjustments
Bay Laurel thrives indoors during colder months by maintaining temperatures between 50-60degF to prevent stress. You should reduce watering frequency, allowing the soil to dry slightly between sessions to avoid root rot in clay pots. Placing your plant near a south-facing window ensures ample light, supporting healthy growth during shorter daylight hours. Monitor humidity levels and mist leaves occasionally to mimic the bay laurel's natural environment and prevent leaf drop.
Repotting Bay Laurel as It Grows Larger
Repotting your Bay Laurel is essential once its roots begin to outgrow the clay pot, typically every 2 to 3 years. Choose a slightly larger pot with good drainage to prevent water retention and root rot. Refresh the soil using a well-draining mix rich in organic matter to support healthy growth. Repotting during early spring encourages strong root development before the growing season.
Harvesting Bay Leaves for Culinary Use
Harvest bay leaves when they are vibrant green and before they start to yellow for the best flavor in your cooking. You can pick individual leaves or prune small branches, ensuring you leave enough foliage for continued growth. After harvesting, dry the leaves by spreading them on a tray in a well-ventilated area away from direct sunlight. Store the dried leaves in an airtight container to preserve their aromatic oils and enhance your meals over time.