Catnip thrives in well-drained soil, but gardening in plots with poor drainage requires careful preparation to ensure plant health. Improving soil structure with organic matter like compost can enhance drainage and prevent root rot. Raised beds or mounded rows are effective techniques to elevate catnip roots above excess water. You can successfully cultivate catnip by addressing moisture management tailored to your garden's unique conditions.
Assessing Soil Drainage: Identifying Problem Areas
Catnip thrives in well-drained soil, so addressing poor drainage in your garden plot is essential for healthy growth. Excess water in poorly drained soil can cause root rot and stunt catnip plant development. To assess drainage, perform a simple test by digging a hole about 12 inches deep and filling it with water; if the water drains within two hours, the soil has adequate drainage. Improving drainage with raised beds or amending soil with organic matter can create the ideal environment for your catnip to flourish.
Choosing the Right Catnip Variety for Wet Soils
Selecting catnip varieties such as Nepeta cataria 'Walker's Low' or 'Six Hills Giant' improves growth in garden plots with poor drainage. These cultivars exhibit greater tolerance to wet soils and resist root rot more effectively than standard types. Improving soil structure by incorporating organic matter enhances drainage and supports healthy root development. Your catnip will thrive when combined with appropriate variety selection and soil management techniques.
Amending Soil: Improving Drainage with Organic Matter
Amending soil in garden plots with poor drainage is essential for successful catnip cultivation. Incorporate generous amounts of organic matter such as compost, aged manure, or peat moss to enhance soil structure and water retention. This process increases aeration and prevents waterlogging, which can cause root rot in catnip plants. Ensuring your soil has balanced moisture levels supports healthy growth and maximizes the aromatic qualities of your catnip.
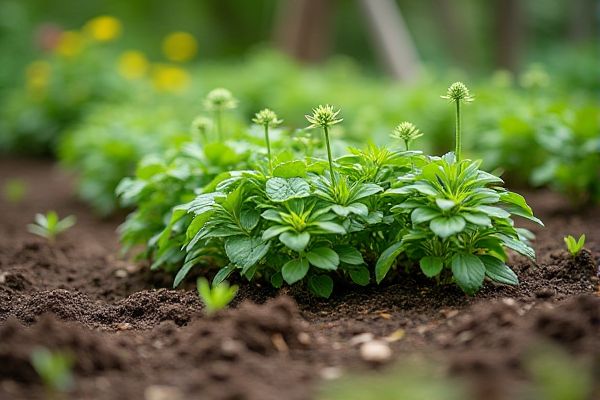
Mound Planting: Elevating Beds for Catnip Success
Planting catnip in garden plots with poor drainage requires creating elevated mounds to improve soil aeration and prevent root rot. Mound planting raises the catnip roots above waterlogged soil, ensuring better drainage and healthier growth. Use a well-draining soil mix with organic matter to enhance moisture control and nutrient availability. Your catnip will thrive when planted on these raised beds, reducing the risk of damage caused by excess moisture.
Selecting Disease-Resistant Catnip Seeds or Seedlings
Choosing disease-resistant Catnip seeds or seedlings helps ensure healthy growth in garden plots with poor drainage. These varieties are less susceptible to root rot and fungal infections caused by excess moisture. You should look for labeled resistant cultivars from reputable suppliers to improve your chances of success. Proper site preparation and drainage improvement complement the benefits of resistant plants.
Sowing Catnip: Seed Depth and Spacing Guidelines
Plant catnip seeds at a shallow depth of about 1/8 inch to ensure proper germination. Space seeds or seedlings approximately 18 to 24 inches apart to allow sufficient airflow and reduce the risk of fungal diseases in poorly drained garden plots. Using raised beds or mounded soil can improve drainage and help prevent root rot. You should also incorporate organic matter like compost to enhance soil structure and moisture control.
Mulching Around Catnip: Reducing Soil Moisture Levels
Mulching around catnip plants helps regulate soil moisture by preventing excess water retention in garden plots with poor drainage. Using organic mulches such as straw or wood chips improves aeration and reduces the risk of root rot. You should apply a 2-3 inch layer of mulch, ensuring it does not touch the plant stems to avoid fungal infections. Proper mulching creates a healthier growing environment, enhancing catnip vigor and resilience.
Watering Wisely: Preventing Overwatering in Poor Drainage
Planting catnip in garden plots with poor drainage requires careful watering to avoid root rot. You should water catnip sparingly, allowing the soil to dry out between sessions, as this herb thrives in well-drained conditions. Using raised beds or adding organic matter can improve soil aeration and help excess water drain more effectively. Proper watering techniques ensure your catnip remains healthy and vibrant despite challenging soil conditions.
Encouraging Air Circulation: Proper Catnip Plant Spacing
Proper spacing between Catnip plants improves air circulation, reducing the risk of fungal diseases in garden plots with poor drainage. Maintaining at least 12 to 18 inches of distance allows your Catnip to dry faster after watering or rain, minimizing moisture retention that can lead to root rot. Ensuring adequate airflow also promotes stronger, healthier growth by preventing overcrowding and competition for nutrients. Your garden's overall health benefits from this practice, especially in areas prone to waterlogging.
Monitoring Catnip for Root Rot and Fungal Diseases
Catnip thrives best in well-drained soil, so planting it in garden plots with poor drainage increases the risk of root rot and fungal diseases. Your catnip plants should be regularly inspected for yellowing leaves, wilting, or blackened stems, which are common signs of root rot. Improving soil aeration by adding organic matter or creating raised beds can help mitigate these issues. Prompt removal of affected plants prevents the spread of fungal infections in the garden.
Fertilizing Catnip: Light Feeding for Healthy Growth
Catnip thrives best in well-drained soil, but when planting in garden plots with poor drainage, careful fertilizing becomes crucial. Use a balanced, slow-release fertilizer with low nitrogen content to avoid excessive foliage growth and promote healthy roots. Waterlogged conditions can cause nutrient leaching, so applying fertilizer in smaller, more frequent doses helps maintain soil fertility. Your catnip will develop robust growth when light feeding aligns with the moisture conditions of your garden plot.
Pruning Catnip: Promoting Vigorous, Compact Plants
Pruning catnip regularly encourages vigorous growth and helps maintain compact plants, especially in garden plots with poor drainage. Removing spent flowers and cutting back stems prevents overcrowding and reduces the risk of root rot caused by excessive moisture. You should prune catnip in early spring and after flowering to stimulate fresh, healthy shoots. Proper pruning enhances airflow around the plant, improving overall resilience in wet garden conditions.
Attracting Pollinators: Supporting Catnip’s Flowering
Catnip thrives best in well-drained soil, but when planting in garden plots with poor drainage, enhancing soil structure can reduce water retention and promote healthier growth. Incorporating organic matter like compost improves aeration, preventing root rot and encouraging robust flowering. Catnip flowers attract pollinators such as bees and butterflies, boosting biodiversity in your garden. Your efforts in managing drainage issues ensure Catnip plants produce abundant blooms, supporting local pollinator populations effectively.
Harvesting Catnip Leaves for Maximum Potency
Catnip thrives best in well-drained soil, so planting it in garden plots with poor drainage can hinder leaf potency and overall growth. To maximize the potency of your catnip leaves, ensure the soil drains adequately or amend it with organic matter such as compost or sand to improve water flow. Harvest leaves just before the plant flowers, when essential oils are at their peak concentration. Your timely and precise harvesting will result in the most aromatic and beneficial catnip leaves.
Winter Care: Protecting Catnip in Damp Conditions
Catnip thrives best in well-drained soil but can struggle in garden plots with poor drainage, especially during winter. To protect your catnip in damp conditions, elevate the planting area by using raised beds or adding organic matter to improve soil structure. Applying a thick layer of mulch helps insulate roots from excess moisture and cold temperatures. Regularly checking for waterlogged soil prevents root rot and maintains plant health throughout the winter months.