Planting chili peppers in school science projects offers a hands-on approach to learning about plant biology, growth cycles, and environmental factors. Students observe germination, measure growth rates, and experiment with variables such as sunlight and watering schedules. This project enhances understanding of photosynthesis, soil composition, and pest management while fostering responsibility and curiosity. Your involvement encourages practical application of scientific concepts within a classroom setting.
Why Choose Chili Peppers for School Science Projects?
Chili peppers are ideal for school science projects due to their fast germination and clear growth stages, making them easy to observe and document. They require minimal space and basic care, suitable for classroom settings and young students. Their sensitivity to environmental changes allows students to experiment with variables like light, soil type, and water. By growing chili peppers, you engage in hands-on learning about plant biology, genetics, and the effects of environmental factors.
Selecting the Best Chili Pepper Varieties for Classroom Growing
Choosing the right chili pepper varieties is crucial for successful school science projects. Opt for small to medium-sized peppers like Jalapeno, Cayenne, or Thai chili, as they are easier to manage and grow faster in classroom conditions. These varieties thrive in well-drained soil with consistent sunlight, making them suitable for indoor or greenhouse setups. Your careful selection ensures a rewarding educational experience with visible growth and vibrant results.
Preparing Your Classroom Planting Area: Soil, Pots, and Lighting
Select well-draining soil rich in organic matter to ensure healthy chili pepper growth. Use pots with drainage holes to prevent waterlogging and root rot during the project. Place the pots in a location that receives at least 6-8 hours of direct sunlight or provide grow lights to simulate natural light conditions. Monitor soil moisture regularly to maintain optimal hydration for seedlings.
Essential Supplies and Equipment for Student Success
Your chili pepper planting project requires essential supplies such as quality seeds, well-draining soil, and appropriately sized pots to ensure healthy growth. A consistent light source, either natural sunlight or grow lights, is critical for seedling development and fruit production. Access to a watering can with a fine spout, alongside fertilizer rich in nitrogen, phosphorus, and potassium, supports plant vigor. Proper labeling and a growth chart help students monitor progress and document scientific observations effectively.
How to Germinate Chili Pepper Seeds Effectively
To germinate chili pepper seeds effectively, begin by soaking the seeds in warm water for 12-24 hours to soften the seed coat and encourage faster sprouting. Plant the seeds in a seed-starting mix that is well-draining and kept consistently moist but not waterlogged. Maintain a temperature between 75degF and 85degF (24degC to 29degC) using a heat mat or a warm windowsill to promote optimal germination. Your chili pepper seeds should sprout within 7 to 14 days under these carefully controlled conditions.
Planting Depth and Seedling Spacing: Classroom Guidelines
Plant chili pepper seeds at a depth of 1/4 inch to ensure proper germination in your school science project. Maintain seedling spacing of 12 to 18 inches apart to provide enough room for healthy growth and airflow. Using a well-draining potting mix enriched with organic matter supports root development and prevents waterlogging. Monitoring moisture levels daily helps young seedlings establish strong roots for successful plant growth.
Creating the Ideal Environment: Temperature, Light, and Humidity
Chili peppers thrive best at temperatures between 70degF and 85degF, making a warm classroom or greenhouse ideal for your school science project. They require at least 6-8 hours of direct sunlight daily, so placing them near a south-facing window or using grow lights ensures optimal growth. Maintaining humidity levels around 50-70% helps prevent leaf drop and promotes healthy development. Monitoring these environmental factors closely supports a successful chili pepper planting experiment.
Watering Chili Pepper Plants: Frequency and Methods for Schools
Chili pepper plants require consistent watering to thrive, with schools typically watering them every 2-3 days depending on the climate and soil moisture levels. Using a drip irrigation system or a gentle watering can ensures water reaches the roots without disturbing the soil or seedlings. Maintaining soil moisture between 60-70% promotes healthy growth but avoid waterlogging, which can lead to root rot. You should monitor the soil regularly and adjust the watering schedule based on weather conditions and plant development.
Understanding Fertilizer Needs for Young Chili Plants
Young chili plants require a balanced fertilizer rich in nitrogen, phosphorus, and potassium to support healthy leaf and root development. Applying a 10-10-10 NPK fertilizer ensures your chili seedlings receive essential nutrients during their early growth stages. Over-fertilizing can lead to nutrient burn, so it's vital to follow recommended application rates based on plant size and soil conditions. Regular soil testing helps adjust fertilizer needs, promoting robust plant health and higher chili yields in your school science project.
Managing Common Pests and Diseases in School Settings
Chili pepper plants in school science projects often face challenges from pests like aphids, spider mites, and whiteflies, which can damage leaves and stunt growth. Implementing natural pest control methods, such as introducing ladybugs or spraying neem oil, helps maintain a healthy plant environment without harmful chemicals. Monitoring plants regularly for early signs of fungal diseases like powdery mildew and providing adequate air circulation reduces the risk of spread. Your attention to pest and disease management ensures successful growth and learning outcomes for the chili pepper project.
Observing Growth: Tracking Development for Scientific Discovery
Monitoring chili pepper growth in your school science project provides valuable insights into plant development stages, from germination to fruiting. Recording data on factors like soil moisture, temperature, and sunlight helps identify optimal conditions for healthy growth. Measuring plant height and leaf size at regular intervals supports understanding the influence of environmental variables. Documenting these observations enhances scientific discovery and practical skills in plant biology.
Transplanting Chili Seedlings: When and How in the Classroom
Transplant chili seedlings when they develop at least two sets of true leaves, typically 3-4 weeks after germination. Use small pots with well-draining soil to gently transfer seedlings, minimizing root disturbance. Provide ample light and maintain temperatures around 70-85degF (21-29degC) to support healthy growth. Your students will observe faster development and stronger plants by following these transplanting guidelines.
Supporting Taller Plants: Staking Tips for Young Gardeners
Chili pepper plants can grow tall and may require staking to prevent bending or breaking during your school science project. Use bamboo stakes or wooden sticks placed about one inch away from the stem to avoid root damage. Tie the stem loosely with soft garden ties or strips of cloth to support growth while allowing movement. Proper staking enhances air circulation and sunlight exposure, promoting healthier chili pepper plants.
Harvesting Chili Peppers: Signs of Readiness and Safe Handling
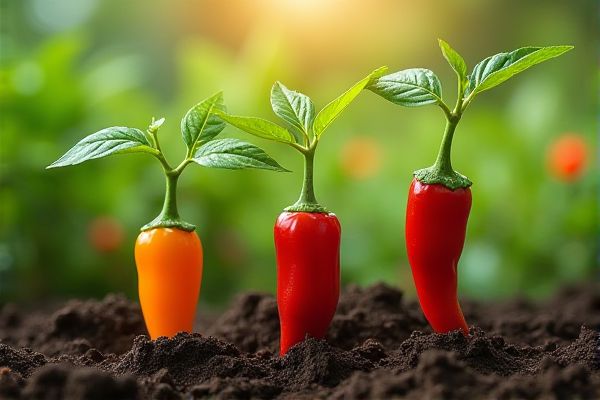
Chili peppers are ready to harvest when they display vibrant color changes, typically turning red, orange, or yellow depending on the variety, and their skin feels firm to the touch. Your plants should exhibit mature size, and the peppers will have a glossy appearance, indicating peak ripeness. Use gloves when picking to avoid skin irritation from capsaicin, especially in a school setting where students might be sensitive. Store the harvested peppers in a cool, dry place to maintain freshness for school science project analysis.
Turning Data Into Reports: Encouraging Scientific Communication
Recording detailed observations during your chili pepper planting project helps transform raw data into meaningful reports. Note variables such as soil type, watering frequency, and sunlight exposure to analyze their effects on plant growth. Use graphs and charts to visually represent growth patterns and compare results across different conditions. Clear and structured reporting enhances your scientific communication skills and supports evidence-based conclusions.