Dill thrives exceptionally well in raised garden beds, offering better soil drainage and improved root growth compared to traditional ground planting. Your raised beds provide optimal conditions for dill's feathery green leaves and aromatic seeds, making it easier to control pests and soil nutrients. This herb prefers full sun exposure and well-drained, slightly acidic to neutral soil with a pH between 5.5 and 7.0. Ensuring proper spacing and regular watering will maximize your dill harvest and enhance its flavor.
Why Raised Garden Beds Are Ideal for Growing Dill
Raised garden beds provide excellent drainage, which prevents Dill roots from becoming waterlogged and promotes healthy growth. The warm soil in raised beds encourages faster germination and extends the growing season for Dill. You can easily control the soil quality by adding organic matter, ensuring the ideal nutrient balance for Dill's delicate flavor. Raised beds also reduce weed competition, allowing your Dill to thrive with minimal maintenance.
Essential Tools and Supplies for Planting Dill in Raised Beds
To plant dill successfully in raised garden beds, ensure you have well-draining soil rich in organic matter and a sunny location that receives at least 6 hours of light daily. Use peat pots or seed trays for starting seeds indoors before transplanting them carefully into your raised beds to promote healthy root development. A garden trowel, watering can or hose with a gentle spray nozzle, and mulch for moisture retention are essential supplies for maintaining plant health. Monitoring soil moisture and spacing plants about 12 inches apart helps optimize growth and prevents overcrowding in your raised garden bed.
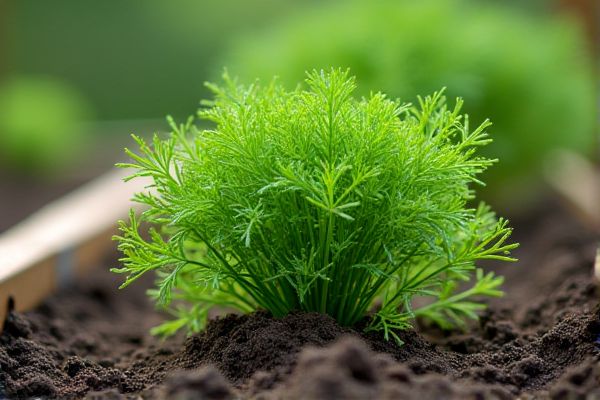
Best Soil Mix for Thriving Dill Plants
Dill thrives best in well-draining soil rich in organic matter, with a slightly acidic to neutral pH between 6.0 and 7.0. A soil mix combining equal parts compost, peat moss, and perlite ensures proper aeration and moisture retention for your raised garden beds. Incorporate slow-release, balanced fertilizer to provide essential nutrients throughout the growing season. Your dill plants will benefit from this nutrient-rich environment, promoting vigorous growth and abundant harvests.
How to Prepare Raised Beds for Dill Seeds
To prepare raised beds for dill seeds, start by loosening the soil to a depth of at least 12 inches to ensure proper root development. Incorporate organic matter such as compost or well-rotted manure to improve soil fertility and drainage. Maintain a soil pH between 5.5 and 6.5 for optimal dill growth. Your raised bed should be placed in a sunny location with full sun exposure to promote healthy seedlings.
When and How to Plant Dill Seeds Outdoors
Dill seeds should be planted outdoors in raised garden beds after the last frost date, typically when soil temperatures reach around 60degF (15degC). Sow seeds about 1/4 inch deep, spacing them 12 to 18 inches apart to allow for proper growth and air circulation. Keep your raised bed soil consistently moist but well-drained to encourage fast germination, which usually occurs within 10 to 14 days. Thin seedlings to about 12 inches apart once they reach 2 inches tall to ensure healthy development of mature dill plants.
Proper Spacing: How Far Apart to Plant Dill in Raised Beds
Plant dill should be spaced about 12 to 18 inches apart in raised garden beds to ensure adequate airflow and room for growth. Crowded plants can lead to poor air circulation, increasing the risk of fungal diseases. When planting your dill, ensure each seedling or seed has enough space to develop a strong root system and reach its full height of 2 to 3 feet. Proper spacing promotes healthier plants and higher yields of aromatic leaves.
Ideal Sunlight Requirements for Robust Dill Growth
Dill thrives best in full sunlight, requiring at least 6 to 8 hours of direct sun daily to develop strong stems and aromatic leaves. In raised garden beds, positioning your dill where it receives ample sunlight improves photosynthesis, promoting healthier growth and a richer flavor. Partial shade can lead to leggy plants and reduced essential oil concentration, diminishing the herb's culinary value. Ensuring your dill's sun exposure aligns with these requirements maximizes your garden's yield and herb potency.
Watering Dill: How Often and How Much
Dill thrives in raised garden beds with consistent moisture but does not tolerate waterlogged soil. Water your dill plants deeply about once or twice a week, depending on rainfall and temperature, ensuring the top inch of soil stays moist. Using a drip irrigation system or soaker hose can provide even watering while preventing foliage diseases. Monitor soil moisture regularly to adjust watering frequency and promote healthy dill growth.
Top Mulching Tips to Conserve Moisture for Dill
Applying a 2-3 inch layer of organic mulch, such as straw or shredded leaves, around your dill plants helps retain soil moisture and regulate temperature. Mulch reduces evaporation, ensuring the delicate roots receive consistent hydration essential for healthy growth. Keep the mulch a few inches away from the stems to prevent rot and improve air circulation. Your dill will thrive with balanced moisture and protection from extreme weather conditions.
Fertilizing Dill: What Works Best in Raised Beds?
Dill thrives in raised garden beds enriched with well-draining, nutrient-rich soil. Applying a balanced fertilizer with equal parts nitrogen, phosphorus, and potassium supports healthy leaf growth and strong root development. Organic options like compost or aged manure improve soil structure and provide essential micronutrients. You should fertilize dill plants every four to six weeks during the growing season to maintain optimal nutrient levels.
How to Thin Dill Seedlings for Healthy Growth
Thin dill seedlings when they reach about 2 inches tall to prevent overcrowding and ensure proper airflow. Space the seedlings approximately 6 to 8 inches apart to promote healthy root development and reduce competition for nutrients. Use small scissors or pinch off the weaker seedlings at the soil line to avoid disturbing the roots of surrounding plants. Proper thinning supports your dill's vigorous growth and enhances foliage quality for harvesting.
Pest and Disease Prevention for Dill in Raised Beds
To protect your dill in raised garden beds, ensure proper spacing to improve air circulation and reduce fungal diseases like powdery mildew. Incorporate neem oil or insecticidal soap sprays regularly to manage common pests such as aphids and caterpillars early. Rotate your dill crops each season to prevent soil-borne diseases and avoid planting dill near plants susceptible to similar pests. Maintaining clean beds free of debris also helps minimize overwintering pests and disease spores.
Supporting Tall Dill Plants: Staking and Wind Protection
Tall dill plants in raised garden beds benefit from sturdy stakes made of bamboo or metal to prevent bending or breaking. Position stakes close to the main stem and gently tie the plant using soft garden ties or twine to avoid damage. Surround your raised bed with windbreaks such as mesh screens or strategically placed shrubs to shield dill from harsh winds. This support system ensures healthy growth and maximizes the yield of your dill harvest.
Harvesting Dill Leaves and Seeds at the Perfect Time
Dill leaves are best harvested just before the plant flowers, usually around 40 to 60 days after planting, to ensure maximum flavor and aroma. You can snip individual leaves or cut whole stems early in the morning when the essential oils are most concentrated. For seeds, wait until the flower heads turn brown and begin to dry, then cut and hang them upside down in a paper bag to catch falling seeds. Your timely harvesting ensures fresh dill for culinary use and viable seeds for future planting.
End-of-Season Care: Clearing and Amending Raised Beds After Dill
After harvesting dill, remove all plant debris from your raised garden beds to prevent disease and pests. Incorporate compost or well-rotted manure into the soil to replenish nutrients and improve soil structure. Lightly till the amended soil to enhance aeration and drainage, preparing the bed for future planting. Ensure the beds are moist but not waterlogged to promote healthy root development for the next crop.