Planting ginger in raised garden beds improves soil drainage and temperature control, creating ideal conditions for this tropical root. Your garden bed should have rich, loamy soil with consistent moisture, allowing rhizomes to develop fully over 8 to 10 months. Positioning the bed in a warm, shaded area enhances growth and protects ginger from direct sunlight. Proper spacing of 6 to 8 inches between rhizomes ensures healthy air circulation and nutrient absorption.
Why Grow Ginger in Raised Garden Beds? Top Benefits
Growing ginger in raised garden beds offers improved soil drainage and aeration, essential for ginger's preference for well-drained, loamy soil. Raised beds help maintain consistent soil temperature and moisture levels, reducing the risk of root rot and fungal diseases. Your ginger plants will benefit from easier weed control and better access to nutrients, promoting healthier and more vigorous growth. This method also simplifies harvesting by providing easy access to the rhizomes without disturbing surrounding plants.
Picking the Right Variety: Best Ginger Types for Raised Beds
Choosing the right ginger variety significantly impacts the success of your raised garden bed. Varieties such as Hawaiian ginger (Zingiber officinale var. rubrum) and Jamaican ginger thrive well in raised beds due to their robust rhizome growth and disease resistance. Opting for organic, disease-free rhizomes ensures healthy plants with higher yield potential. Your raised bed's soil should be rich, well-draining, and slightly acidic, ideally between pH 5.5 and 6.5, to support optimal growth of these ginger types.
Preparing the Ideal Raised Bed Soil for Ginger
Ginger thrives best in well-drained, fertile soil rich in organic matter and slightly acidic with a pH between 5.5 and 6.5. Incorporate plenty of compost or well-rotted manure to enhance soil nutrients and structure, ensuring optimal root development. Your raised garden bed should have a loose, friable texture to allow adequate aeration and moisture retention without waterlogging. Regularly check soil moisture levels to maintain consistent dampness, which is crucial for healthy ginger growth.
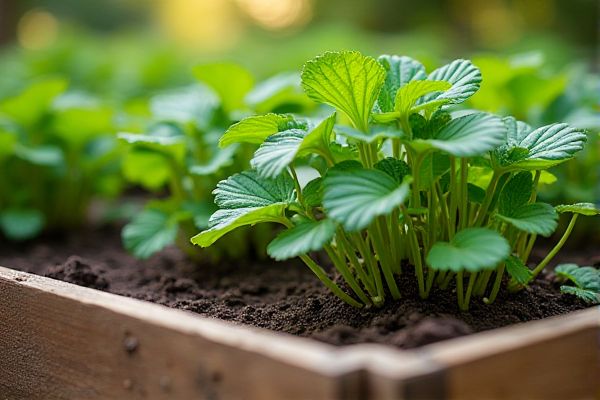
Selecting and Preparing Ginger Rhizomes for Planting
Choose plump, firm ginger rhizomes with visible eye buds for planting in raised garden beds. Cut the rhizomes into sections, each containing at least one eye bud, to ensure healthy sprouting. Soak the cut pieces in water for 24 hours to stimulate growth and reduce the risk of disease. Your raised garden bed soil should be rich, well-draining, and warm to promote optimal ginger root development.
How and When to Plant Ginger in Raised Beds
Plant ginger in raised garden beds during early spring when soil temperatures reach at least 70degF (21degC) to ensure optimal growth. Choose well-draining soil rich in organic matter and plant ginger rhizomes 2-4 inches deep with the buds facing upward, spacing them 8 inches apart. Keep the soil consistently moist but not waterlogged to prevent root rot, and apply a layer of mulch to retain moisture and regulate soil temperature. Your raised bed setup will enhance drainage and warmth, creating an ideal environment for vigorous ginger growth.
Spacing Guidelines for Healthy Ginger Plants
Maintain a spacing of 6 to 8 inches between each ginger rhizome in your raised garden beds to ensure adequate air circulation and nutrient access. Rows should be spaced about 12 inches apart to allow for easy growth and maintenance. Proper spacing reduces the risk of fungal diseases and promotes robust root development. You can improve overall yield by following these spacing guidelines carefully.
Watering Needs: Keeping Ginger Moist but Not Soggy
Ginger thrives in consistently moist soil, requiring about 1-2 inches of water per week for optimal growth in raised garden beds. Your soil should remain damp to the touch but avoid waterlogging, as soggy conditions can lead to root rot. Using mulch helps retain moisture while preventing the soil from drying out quickly. Monitoring soil moisture regularly ensures your ginger plants receive the right hydration without stress.
Mulching Techniques to Retain Moisture and Suppress Weeds
Mulching your raised garden beds with organic materials such as straw, wood chips, or compost helps retain moisture essential for ginger's growth. A 2-3 inch layer of mulch creates a barrier that suppresses weed development, reducing competition for nutrients and water. Mulch also moderates soil temperature, keeping roots cool during hot weather. Proper mulching enhances soil structure and promotes healthy ginger rhizome development in your garden.
Fertilizing Ginger: The Right Nutrients at the Right Time
Ginger thrives when planted in raised garden beds enriched with organic compost and well-balanced fertilizers high in potassium and phosphorus. Applying nitrogen-rich fertilizer during the early growth stages promotes leaf development, while switching to potassium-heavy nutrients supports rhizome formation. Monitoring soil pH between 5.5 and 6.5 ensures optimal nutrient absorption for healthy ginger plants. Your timely fertilization will enhance yield and improve the flavor and size of the harvested ginger.
Sunlight Requirements: Finding the Best Location for Ginger
Ginger thrives in warm, partially shaded environments with indirect sunlight for about 4 to 6 hours daily. Raised garden beds must be positioned to avoid harsh afternoon sun while still receiving sufficient morning light. Your chosen location should offer protection from strong winds and maintain consistent moisture levels in the soil. Selecting the right spot ensures robust growth and a healthy ginger harvest.
Protecting Ginger from Pests and Common Diseases
Raised garden beds provide an ideal environment for growing ginger by improving drainage and soil quality, which helps reduce pest infestations. To protect your ginger from common pests such as aphids, root-knot nematodes, and rhizome flies, use organic insecticidal soap or neem oil sprays regularly. Maintaining proper spacing between plants ensures good air circulation, reducing the risk of fungal diseases like leaf spot and rhizome rot. Consistent monitoring and promptly removing affected plant parts can prevent the spread of diseases and keep your ginger healthy.
Pruning and Managing Ginger Growth
Pruning ginger in raised garden beds helps promote healthy rhizome development and prevents overcrowding. Removing yellow or damaged leaves improves air circulation and reduces the risk of fungal diseases. Regularly thinning out crowded shoots allows your ginger plants to receive adequate sunlight and nutrients. Proper management ensures robust growth and enhances the quality of your ginger harvest.
Recognizing Signs of Ginger Maturity
Ginger reaches maturity typically within 8 to 10 months after planting in raised garden beds. You can identify maturity when the leaves begin to yellow and die back, indicating the rhizomes are fully developed. The size and firmness of the ginger rhizomes also serve as key indicators before harvesting. Monitoring soil moisture and avoiding overwatering are crucial during this final growth phase.
How and When to Harvest Ginger in Raised Beds
Ginger planted in raised garden beds is typically ready for harvest 8 to 10 months after planting when the leaves start to yellow and die back. Carefully unearth the rhizomes using a garden fork to avoid damaging the tender roots. Harvest young ginger after about 4-6 months for milder flavor, but full maturity yields more robust, fibrous rhizomes. Your careful timing ensures optimal aroma and pungency of the ginger harvested from your raised bed garden.
Post-Harvest Care: Cleaning, Curing, and Storing Ginger
After harvesting ginger from your raised garden beds, gently brush off excess soil without washing the rhizomes to prevent moisture-related rot. Allow the ginger to cure in a dry, well-ventilated area for about a week to enhance flavor and shelf life. Store cured ginger in a cool, dark place or refrigerate it in an airtight container to maintain freshness. Proper post-harvest care ensures your ginger remains flavorful and ready for future use.