Stevia thrives best in sandy loam soil, which offers excellent drainage and optimal aeration for root development. This soil type ensures your stevia plants receive the right balance of moisture and nutrients, promoting healthy growth and high sweetness levels in the leaves. Maintaining a pH between 6.5 and 7.5 further enhances nutrient availability and plant vigor. Proper soil preparation and consistent care will help you achieve a robust stevia harvest.
Selecting the Right Stevia Variety for Sandy Loam Soils
Choose Stevia varieties known for their adaptability to sandy loam soil, such as 'Morita II' or 'Eirete,' which exhibit strong root development and drought tolerance. Sandy loam's well-draining properties prevent waterlogging but require consistent moisture management to avoid stress on the plants. Enriching the soil with organic matter enhances nutrient retention and supports healthier Stevia growth. By selecting the appropriate variety and optimizing soil conditions, your Stevia cultivation will yield sweeter leaves and higher concentrations of steviol glycosides.
Prepare Your Sandy Loam: Soil Testing and Amendments
Conduct a comprehensive soil test to determine pH levels and nutrient content in your sandy loam soil before planting Stevia. Stevia thrives in slightly acidic to neutral pH ranging from 6.5 to 7.5, so apply lime or sulfur to adjust soil acidity accordingly. Incorporate organic matter such as compost or well-rotted manure to improve moisture retention and nutrient availability in sandy loam. Proper soil preparation enhances root development and maximizes Stevia yield from Your planting efforts.
Optimal pH Range: Adjusting Soil Acidity for Stevia
Stevia thrives best in sandy loam soil with a pH range between 6.0 and 7.5, ensuring optimal nutrient availability and growth. Sandy loam soil provides excellent drainage while retaining sufficient moisture to support Stevia's root development. You should regularly test your soil pH and amend it using lime to raise pH or sulfur to lower pH for maintaining the ideal acidity level. Proper pH adjustment promotes healthier leaves, which directly impact the sweetness and yield of your Stevia crop.
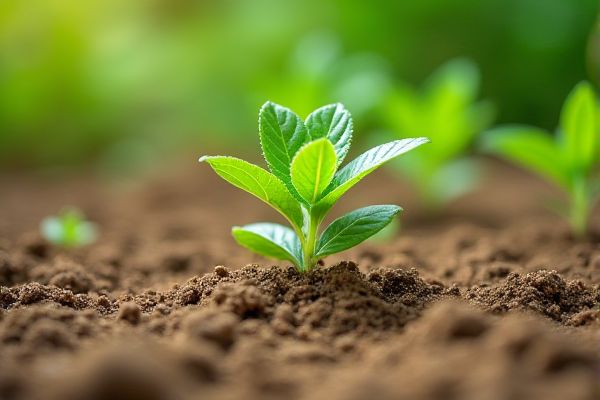
Choosing Healthy Stevia Seedlings or Cuttings
Selecting healthy stevia seedlings or cuttings is crucial for successful growth in sandy loam soil. Look for vibrant green leaves and strong stems, indicating disease-free and vigorous plants. Your chosen seedlings should have well-developed root systems to ensure better water and nutrient absorption in the sandy loam environment. Properly selected plant material enhances yield and sweetness of Stevia leaves.
Spacing Guidelines for Stevia Planting
When planting Stevia in sandy loam soil, maintain a spacing of 18 to 24 inches between each plant to ensure adequate air circulation and root development. Rows should be spaced 24 to 30 inches apart to facilitate efficient irrigation and harvesting. Proper spacing minimizes competition for nutrients and optimizes plant growth. This setup will help your Stevia thrive and produce a higher yield.
Proper Planting Depth for Stevia in Sandy Loam
Stevia thrives best when planted at a depth of 1 to 1.5 inches in sandy loam soil, ensuring optimal root development and moisture retention. Sandy loam's well-draining nature prevents waterlogging, which is crucial for the shallow root system of stevia plants. You should maintain consistent soil moisture to support steady growth, avoiding both drought stress and excessive wetness. Proper planting depth paired with sandy loam's aeration properties enhances nutrient uptake and overall plant health.
Watering Schedule for Newly Planted Stevia
Newly planted Stevia in sandy loam soil requires consistent watering to maintain soil moisture without waterlogging. Maintain a schedule of watering every 2-3 days, ensuring the top 1-2 inches of soil stay moist. Sandy loam's quick drainage means you need to monitor soil dryness frequently. You should avoid prolonged dryness to support healthy root establishment and optimal growth.
Mulching Techniques to Retain Moisture
Mulching plays a crucial role in retaining moisture when planting Stevia in sandy loam soil, which typically drains quickly and loses water rapidly. Organic mulches like straw, wood chips, or dried leaves create a protective barrier that reduces evaporation, maintains soil temperature, and suppresses weed growth. Applying a 2-3 inch layer of mulch around your Stevia plants helps conserve water, ensuring steady moisture levels essential for optimal growth and leaf quality. Proper mulching can significantly enhance water efficiency and promote healthier Stevia harvests.
Fertilizer Requirements for Stevia Growth
Stevia thrives best in sandy loam soil with balanced fertilization to enhance leaf sweetness and yield. Nitrogen should be applied at a rate of 60-90 kg/ha to support healthy foliage development, while phosphorus and potassium are recommended at 40-60 kg/ha to improve root growth and stress tolerance. Incorporating organic matter such as compost can further enhance soil fertility and moisture retention. Your Stevia plants will benefit from regular soil testing to adjust fertilizer doses according to nutrient availability.
Weed Control Strategies in Sandy Loam Soil
Effective weed control in sandy loam soil is crucial for healthy Stevia cultivation. Mulching helps retain soil moisture and suppresses weed growth around Stevia plants. Applying pre-emergent herbicides can prevent weed seeds from germinating without harming your crop. Regular manual weeding ensures that competing plants do not hinder the development of your Stevia leaves.
Identifying and Managing Stevia Pests
Stevia planted in sandy loam soil often faces challenges from pests such as whiteflies, aphids, and spider mites that thrive in well-drained conditions. Regular monitoring is crucial to detect early infestations and prevent damage to leaves, which can reduce the plant's sweetener yield. Employing natural predators like ladybugs or using organic insecticides helps maintain pest populations without harming the soil health. Your careful pest management ensures robust growth and maximizes the quality of Stevia leaves grown in sandy loam environments.
Recognizing and Treating Stevia Diseases
Stevia planted in sandy loam soil is susceptible to common diseases such as powdery mildew, leaf spot, and root rot. Early identification of symptoms like white fungal growth, brown lesions, or wilting can help prevent severe damage. Applying appropriate fungicides and maintaining proper soil drainage are critical to controlling disease spread. You should regularly inspect your Stevia plants and remove infected leaves to promote healthy growth.
Pruning Stevia for Bushier Growth
Pruning Stevia in sandy loam soil encourages bushier growth and increases leaf production. You should trim the stems regularly once the plant reaches about 12 inches in height, focusing on cutting above the leaf nodes. This practice redirects energy to lateral branches, promoting a fuller plant structure. Consistent pruning helps maximize yield in your Stevia cultivation.
Harvesting Stevia Leaves at Peak Sweetness
Harvest stevia leaves when their glycoside content reaches its highest concentration, typically just before flowering. This timing ensures maximum sweetness and potency for your harvest. Sandy loam soil promotes proper drainage, which helps maintain the health of the stevia plants, leading to better leaf quality. To optimize sweetness, consistently monitor leaf color and texture, harvesting when leaves turn deep green and slightly glossy.
Post-Harvest Care: Drying and Storing Stevia
After harvesting Stevia from sandy loam soil, it is essential to dry the leaves properly to preserve their sweetness and medicinal properties. Spread the leaves in a thin layer under shade with good air circulation to avoid direct sunlight, which can degrade active compounds. Once thoroughly dried, store the Stevia leaves in airtight containers away from moisture and heat to maintain quality. Your careful post-harvest handling ensures maximum potency and shelf life of the Stevia product.