Planting a ZZ plant in a jar creates a stylish, low-maintenance indoor garden perfect for any space. This tropical plant, known scientifically as Zamioculcas zamiifolia, thrives in well-draining soil and requires minimal watering, making it ideal for jar cultivation. By selecting the right jar size and ensuring proper drainage, you can prevent root rot and promote healthy growth. Your ZZ plant will add vibrant green foliage and air-purifying benefits to your home or office.
Why Choose a ZZ Plant for Jar Planting? Key Benefits
ZZ plants thrive in low-light conditions, making them ideal for indoor jar planting where sunlight is limited. Their waxy, smooth leaves retain moisture efficiently, reducing the need for frequent watering and minimizing root rot risks. You will appreciate their slow growth rate, which allows them to remain compact and visually appealing in confined jar spaces. This hardy plant also purifies indoor air, enhancing the environment around your living space.
Selecting the Ideal Jar: Size, Shape, and Material Matters
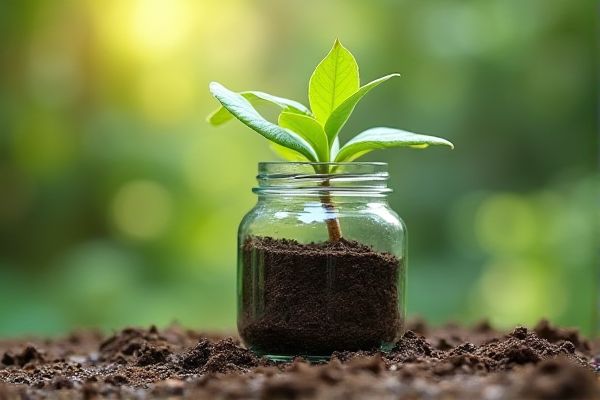
Choose a jar that provides enough space for your ZZ plant's roots to grow without overcrowding, ideally around 6 to 8 inches in diameter. Opt for glass or clear containers to monitor moisture levels easily, but ensure proper drainage by adding a layer of pebbles or activated charcoal at the bottom. Wide-mouthed jars allow better airflow and easy access for watering and pruning, which supports healthy growth. Your choice of jar material and size directly influences the ZZ plant's overall health and longevity.
Choosing the Right ZZ Plant Variety for Your Space
Selecting the appropriate ZZ plant variety ensures healthy growth and aesthetic appeal for your indoor jar garden. Consider smaller cultivars like Zamioculcas zamiifolia 'Raven' for compact spaces and brighter leaf coloration. Assess light availability and humidity levels in your environment to match the plant's needs. Your choice will influence maintenance frequency and overall success in creating a vibrant green addition to your space.
Essential Tools and Supplies for Planting ZZ in a Jar
A well-draining soil mix, such as a blend of potting soil and perlite, provides the ideal foundation for your ZZ plant in a jar. Choose a transparent glass jar with drainage holes or add a layer of small pebbles at the bottom to prevent waterlogging and root rot. A watering can with a narrow spout helps you control moisture levels effectively, while a pair of gardening gloves protects your hands during repotting. Using these essential tools ensures your ZZ plant thrives in its unique jar environment.
Preparing the Jar: Cleaning and Drainage Considerations
Ensure your jar is thoroughly cleaned to prevent bacterial growth that can harm your ZZ plant. Since jars typically lack drainage holes, add a layer of small stones or activated charcoal at the bottom to improve water drainage and prevent root rot. Use a well-draining soil mix specifically designed for ZZ plants, which prefer slightly dry conditions. Your ZZ plant will thrive with proper jar preparation, avoiding waterlogging and promoting healthy root development.
Best Soil Mix for Healthy ZZ Growth in a Jar
The best soil mix for planting a ZZ plant in a jar is well-draining and rich in organic matter to prevent waterlogging and root rot. A combination of cactus potting mix and perlite or coarse sand provides excellent aeration and moisture control. Your ZZ plant will thrive when the soil retains some moisture but dries out between waterings, ensuring healthy root development. Incorporate a small amount of compost to supply essential nutrients for sustained growth.
Proper Planting Technique: Settling Your ZZ Plant in the Jar
Ensure your ZZ plant's roots are gently spread out before placing it in the jar to prevent overcrowding. Use well-draining soil specifically formulated for indoor plants to promote healthy root growth and avoid waterlogging. Keep your ZZ plant's stem upright and fill the jar around the roots, leaving enough space at the top for watering. Your careful planting technique will help establish a strong foundation for long-lasting growth and vibrant foliage.
Positioning for Success: Finding the Perfect Spot for Light
ZZ plants thrive in bright, indirect light, making it essential to place your jar near a north- or east-facing window. Avoid direct sunlight, which can scorch the leaves and hinder growth. You should rotate the jar every few weeks to ensure even light exposure and steady development. Proper light placement will keep your ZZ plant vibrant and healthy.
Watering ZZ Plants in Jars: Frequency and Amount Tips
ZZ plants in jars require infrequent watering due to their drought-tolerant nature and limited soil volume. Water your plant only when the top inch of soil feels dry to the touch, usually every 2-3 weeks, to prevent root rot. Use just enough water to moisten the soil without saturating it, typically about 1/4 to 1/2 cup depending on jar size. Proper drainage is crucial, so ensure your jar has an adequate drainage layer or holes to maintain healthy roots.
Humidity and Temperature Requirements for Jar-Housed ZZ Plants
ZZ plants thrive in a warm environment with temperatures between 65degF and 75degF, which supports optimal growth when housed in a jar. Maintaining humidity levels around 40-50% is crucial to prevent the plant from drying out in the enclosed space. Your ZZ plant will benefit from regular misting to replicate its natural tropical habitat and promote healthy foliage. Avoid placing the jar in direct sunlight to prevent heat buildup and leaf scorch.
Fertilizing ZZ Plants: What, When, and How
ZZ plants thrive with a balanced, water-soluble fertilizer containing nitrogen, phosphorus, and potassium, ideally in a 20-20-20 ratio. Apply fertilizer every 4 to 6 weeks during the growing season, typically from spring through early fall, to support healthy foliage and root development. Dilute the fertilizer to half the recommended strength to prevent nutrient burn in your ZZ plant jar setup. Monitoring your plant's response ensures you adjust feeding schedules and maintain optimal growth conditions.
Pruning and Grooming for a Neat, Healthy ZZ Plant
Regular pruning helps maintain the shape and health of your ZZ plant by removing yellowing or damaged leaves. Use clean, sharp scissors to trim stems and encourage new growth. Groom the plant by wiping the leaves with a damp cloth to remove dust and improve photosynthesis efficiency. Proper care ensures your ZZ plant thrives in its jar environment, promoting vibrant and lush foliage.
Recognizing and Solving Common ZZ Plant Problems in Jars
ZZ plants in jars often face root rot due to overwatering and poor drainage, which can be mitigated by using well-draining soil and adding pebbles at the bottom of the jar. Yellowing leaves usually indicate underwatering or insufficient light, so placing your jar near a bright, indirect light source helps maintain healthy foliage. Pests such as spider mites and mealybugs can infest the plant; regular inspection and wiping leaves with insecticidal soap can prevent damage. Maintaining a consistent environment with moderate humidity and avoiding temperature extremes supports your ZZ plant's overall vigor in a jar setting.
Repotting and Refreshing Your ZZ Plant’s Environment
Repotting your ZZ plant in a glass jar improves root aeration and drainage, promoting healthier growth. Use well-draining soil mixed with perlite or coarse sand to prevent waterlogging. Ensure the jar has adequate drainage holes or create a pebble layer at the bottom to avoid root rot. Refresh the soil every 1-2 years to provide essential nutrients and maintain optimal growing conditions.
Decorating Ideas: Personalizing Your ZZ Plant Jar Display
Transform your ZZ plant jar into a personalized decor statement by incorporating decorative stones, moss, or colorful sand layers that highlight the plant's vibrant green foliage. Selecting a uniquely shaped or textured jar can enhance the overall aesthetic, while adding miniature figurines or wooden tags with your name creates a custom touch. Position your ZZ plant jar in well-lit areas such as windowsills or desks to emphasize its natural beauty and bring life to your space. Your creativity in arranging these elements will make the display uniquely yours and visually captivating.