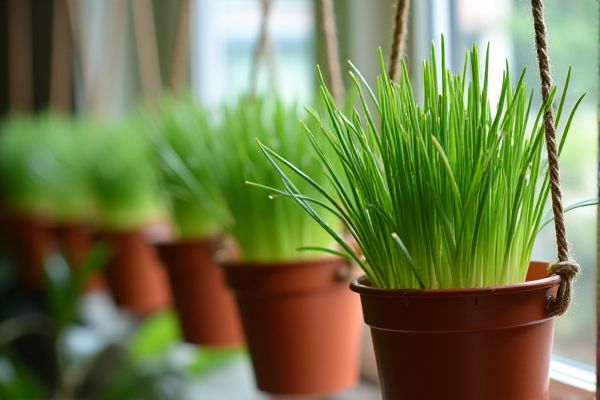
Chives thrive in indoor hanging pots, making them an ideal herb for limited spaces. These hardy perennials require well-draining soil and plenty of sunlight, preferably near a south-facing window, to flourish. Regular watering and proper ventilation ensure your chives remain healthy and vibrant. Growing chives indoors enhances your culinary creations with fresh, flavorful greens at your fingertips.
Why Choose Chives for Indoor Hanging Pots
Chives thrive in indoor hanging pots due to their compact growth and minimal space requirements, making them ideal for small living areas. Their preference for well-drained soil and indirect sunlight aligns perfectly with typical indoor environments. You can easily harvest fresh, flavorful chives for culinary use, enhancing meals with minimal effort. Growing chives indoors also helps improve air quality and adds a vibrant touch of green to your home decor.
Best Chive Varieties for Container Growing
Chives thrive in hanging pots when you choose varieties that adapt well to container growing, such as garlic chives and common chives (Allium schoenoprasum). Garlic chives offer a mild garlic flavor and grow upright, making them ideal for indoor setups with limited space. Common chives provide classic onion-like tastes and respond well to regular trimming, encouraging denser growth. Your indoor garden will benefit from selecting these robust varieties designed for confined hanging pots, ensuring a continuous supply of fresh herbs.
Selecting the Right Hanging Pots for Chives
Choose hanging pots with proper drainage holes to prevent waterlogging, which is essential for healthy chive growth. Containers made from lightweight materials like plastic or resin ease indoor hanging and reduce strain on hooks. Ensure the pot size is at least 6-8 inches in diameter to accommodate mature chive root systems. Your chives will thrive better when the pots allow adequate airflow and moisture control.
Ideal Potting Mix for Healthy Chive Growth
Use a well-draining potting mix rich in organic matter for optimal chive growth in hanging pots indoors. A blend of peat moss, perlite, and compost provides the necessary nutrients and moisture retention. Ensure the soil pH is slightly acidic to neutral, between 6.0 and 7.0, to promote healthy root development. Your chives will thrive in this environment, producing flavorful leaves for culinary use.
Light Requirements: Placing Pots for Maximum Sun
Chives thrive best when positioned in a location that receives at least 6 hours of direct sunlight daily. Your hanging pots should be placed near south-facing windows to maximize exposure to natural light. If natural light is insufficient, supplement with a grow light to ensure healthy growth and vibrant green leaves. Regularly rotating the pots helps even light distribution and prevents the plants from leaning toward one direction.
Proper Watering Techniques for Indoor Chives
Chives thrive when their soil is kept consistently moist but not waterlogged. Water your indoor hanging pots thoroughly until excess water drains from the bottom, ensuring good aeration for the roots. Use a well-draining potting mix to prevent root rot and allow the soil surface to dry slightly between waterings. Monitoring the moisture level regularly helps maintain optimal hydration for your chives' growth.
Best Fertilizers for Lush, Flavorful Chives
For lush, flavorful chives growing in hanging pots indoors, choose a balanced, water-soluble fertilizer with an N-P-K ratio around 10-10-10. Organic options like fish emulsion or seaweed extract provide essential nutrients while promoting healthy soil microbiota. Apply fertilizer every 4-6 weeks during the active growing season to support vibrant growth and robust flavor. Ensure you follow the recommended dilution rates to avoid overfeeding your chives and maintain optimal health.
Temperature and Humidity Needs for Chives Indoors
Chives thrive indoors at temperatures between 60degF and 75degF, which supports optimal growth and prevents stress. Maintaining humidity levels around 40-60% helps keep the leaves lush and reduces the risk of fungal diseases. Place your hanging pots in areas with good air circulation to balance humidity and avoid damp conditions. By controlling these environmental factors, you ensure your chives grow healthy and flavorful in your indoor space.
Seeds or Divisions: Propagating Chives for Pots
Chives can be propagated indoors in hanging pots either by seeds or divisions. Starting from seeds requires sowing them about 1/4 inch deep in well-draining soil and maintaining consistent moisture until germination, which typically occurs within 7 to 14 days. Divisions involve separating mature clumps from an established chive plant and replanting them into individual pots, allowing for quicker growth compared to seeds. Your choice depends on the desired speed of growth and available starting material.
Sowing Chive Seeds: Step-by-Step Planting Guide
Sow chive seeds in a lightweight, well-draining potting mix inside hanging pots for optimal growth indoors. Maintain soil moisture by watering gently to keep it consistently damp but not waterlogged. Position your hanging pots in a bright spot with at least 6 hours of indirect sunlight daily to encourage healthy sprouting. Once seedlings reach 4 inches, thin them to prevent overcrowding and promote stronger growth.
Proper Spacing and Depth for Chive Planting
For planting chives in hanging pots indoors, ensure each chive clump is spaced about 4 to 6 inches apart to promote healthy growth and air circulation. Plant chive bulbs or seeds at a depth of approximately 1 inch in well-draining potting soil enriched with organic matter. Your hanging pots should have enough depth, ideally 6 to 8 inches, to accommodate root development and moisture retention. Maintaining this spacing and depth will help your chives thrive indoors, providing a consistent harvest.
Pruning and Harvesting Chives for Continuous Growth
Regular pruning of chives in your hanging pots encourages dense, healthy foliage and prevents the plant from flowering too early. Use sharp scissors to cut the leaves about 1-2 inches above the soil level, which stimulates new growth. Harvest chives frequently by snipping the leaves at the base, ensuring you leave at least 3 inches of the plant to keep it thriving. Proper pruning and harvesting techniques extend your chives' productive season and maintain a steady supply for your indoor kitchen.
Preventing and Managing Pests in Indoor Chive Pots
Pests like aphids and spider mites commonly affect indoor chive pots, causing damage to leaves and stunting growth. Keeping your chives in well-ventilated areas and regularly inspecting the plants helps detect infestations early. Using insecticidal soap or neem oil can effectively control pests without harming your indoor environment. Maintaining proper humidity levels and avoiding overwatering reduces the risk of pest outbreaks in hanging pots.
Signs of Common Chive Problems and How to Fix Them
Yellowing leaves on chives often indicate overwatering or poor drainage, causing root rot. If you notice stunted growth, it may be due to insufficient light; placing your hanging pots near a south-facing window can improve sunlight exposure. Brown tips on the leaves can signal low humidity or nutrient deficiencies, which can be corrected by misting the plants and using a balanced fertilizer monthly. Regularly inspect for pests like aphids or spider mites and treat infestations with insecticidal soap promptly.
Winter Care for Indoor Hanging Chive Plants
Indoor hanging chive plants require consistent moisture and indirect sunlight during winter to thrive. Maintain soil temperature between 60-70degF to support healthy root growth. You should trim dead leaves regularly to prevent disease and encourage new shoots. Ensuring proper air circulation around your chives will reduce the risk of fungal infections during the colder months.