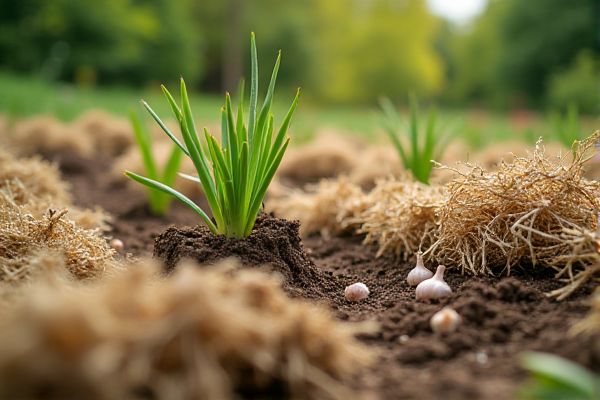
Growing garlic in straw bales offers an innovative approach to gardening that enhances soil drainage and reduces weed growth. This method provides your garlic bulbs with a nutrient-rich, well-aerated environment, promoting healthy root development and robust yields. Straw bales retain moisture effectively, minimizing the need for frequent watering and creating optimal conditions for garlic's growth cycle. By choosing this technique, you can enjoy a more manageable and productive garlic harvest in your garden space.
Benefits of Planting Garlic in Straw Bales
Planting garlic in straw bales offers improved soil drainage and prevents soil compaction, promoting healthier root development. Straw bales naturally retain moisture, reducing the need for frequent watering and ensuring consistent hydration for your garlic. The elevated growing environment minimizes weed competition and deters pests, enhancing garlic bulb quality. Nutrients from decomposing straw enrich the growing medium, supporting vigorous garlic growth throughout the season.
Selecting the Best Garlic Varieties for Straw Bale Gardening
Hardneck garlic varieties, such as Rocambole and Purple Stripe, thrive well in straw bale gardens due to their adaptability and robust flavor profiles. Softneck types like Silverskin also perform effectively, offering longer storage life and disease resistance suited for straw bale conditions. Your choice should consider local climate, disease prevalence, and intended harvest time to maximize yield and quality. Planting certified disease-free garlic cloves ensures healthy growth and reduces the risk of crop failure in straw bale gardens.
Preparing Straw Bales for Garlic Planting
Straw bales must be fully composted and warm before planting garlic cloves to ensure optimal growth. Water the bales thoroughly and monitor the temperature until it reaches about 120degF, promoting nutrient availability for your garlic. Place garlic cloves 4 to 6 inches apart on the bale's surface, with the pointed end up for proper root development. Maintaining consistent moisture and protecting bales from pests will improve your garlic yield throughout the growing season.
Conditioning Your Straw Bales: Step-by-Step
Begin conditioning your straw bales by soaking them with water for several days to initiate microbial activity and heat generation. Turn the bales every two days to ensure even decomposition and prevent mold buildup. Monitor the internal temperature, aiming for 130-150degF to create a nutrient-rich environment ideal for garlic growth. After about 10-14 days, your straw bales will be conditioned and ready for planting garlic cloves.
When to Plant Garlic in Straw Bales
Plant garlic cloves are best planted in straw bales during the fall, typically 4 to 6 weeks before the first expected frost. This timing allows the garlic to establish roots and undergo necessary cold stratification for optimal bulb development. Ensure your straw bales are well-conditioned with proper moisture and nutrients before planting to support healthy growth. Your garlic will benefit from the warmth retained by the straw, promoting successful germination and robust harvests.
How to Space and Plant Garlic Cloves in Straw Bales
Plant garlic cloves in straw bales by spacing them about 4 to 6 inches apart to ensure ample room for bulb growth. Insert each clove pointy end up, burying it roughly 2 inches deep into the straw to promote healthy root development. Maintain consistent moisture and monitor the straw's temperature to support optimal growth throughout the season. Your careful spacing and planting technique will result in a bountiful garlic harvest.
Essential Watering Tips for Straw Bale Garlic
Consistent moisture is crucial when planting garlic in straw bales to ensure healthy bulb development. Water the bale thoroughly after planting, then maintain even moisture by watering 2-3 times per week, especially during dry spells. Avoid overwatering, as soggy conditions can lead to mold and bulb rot. Your garlic will thrive when the straw bale remains damp but not saturated throughout the growing season.
Fertilizing Straw Bales for Healthy Garlic Growth
Fertilizing straw bales is essential for promoting healthy garlic growth by providing necessary nutrients like nitrogen, phosphorus, and potassium. Applying a balanced fertilizer or compost directly into the straw bale before planting ensures that your garlic plants receive adequate nourishment throughout their growth cycle. Monitoring soil moisture and periodically adding liquid fertilizer can further support robust bulb development. Your careful nutrient management will lead to bigger, more flavorful garlic harvests.
Managing Weeds and Pests in Straw Bale Gardens
Straw bale gardens provide a natural barrier against many common garden weeds, reducing the need for manual weeding. You can apply mulch or natural repellents around your garlic plants to deter pests like aphids and thrips effectively. Regularly inspecting the straw bales for signs of mold or pests helps maintain a healthy growing environment. Proper watering and fertilization enhance garlic growth while minimizing stress that attracts unwanted insects.
Mulching Techniques for Garlic in Straw Bales
Mulching garlic planted in straw bales helps retain moisture and regulate soil temperature, promoting healthy root development. Organic materials like straw or shredded leaves create a protective layer that suppresses weeds and prevents soil erosion. Proper mulching enhances nutrient retention, reducing the need for frequent fertilization. To maximize your garlic yield, apply a 2-3 inch mulch layer evenly around the plants.
Monitoring Straw Bale Temperature and Moisture
Maintaining optimal temperature and moisture levels in straw bales is crucial for successful garlic growth. Ideal temperatures range between 130degF and 160degF during the initial composting phase to promote microbial activity, followed by a gradual cooling period. Consistent moisture levels resembling a wrung-out sponge ensure roots receive adequate hydration without becoming waterlogged. You should regularly check these conditions to prevent fungal diseases and support healthy garlic bulb development.
Signs of Healthy Garlic Development in Straw Bales
Healthy garlic growing in straw bales exhibits vibrant green shoots with robust, sturdy stems emerging evenly across the bale's surface. Your garlic plants should show thick, fleshy leaves without yellowing or browning, indicating proper hydration and nutrient absorption. Firm, plump bulbs developing beneath the straw bale surface signal successful root growth and nutrient uptake. Consistent moisture levels and good drainage in the straw bale create an ideal environment for garlic to thrive, reducing the risk of mold or rot.
Common Problems and Troubleshooting Garlic Growth
Poor garlic growth in straw bales often results from inadequate moisture levels or nutrient deficiencies. Soil pH should be maintained between 6.0 and 7.0 to promote optimal nutrient absorption. White mold and rust fungus are common fungal issues affecting garlic; using fungicide treatments and ensuring proper air circulation helps prevent these diseases. Your garlic will thrive when you monitor moisture consistently and promptly address pest infestations like onion maggots.
When and How to Harvest Garlic from Straw Bales
Harvest garlic from straw bales when the lower leaves turn brown but the upper leaves remain green, typically 7 to 8 months after planting. Carefully loosen the straw around the bulbs to avoid damaging them during extraction. Cure the harvested garlic by hanging the bulbs in a well-ventilated, dry area for 2 to 3 weeks to enhance flavor and storage longevity. Your timing and handling techniques directly impact the quality and shelf life of the garlic you grow.
Curing and Storing Your Home-Grown Garlic
After harvesting, curing your garlic properly in a well-ventilated, dry area with temperatures between 60-70degF ensures optimal flavor and longevity. You should trim the roots and cut the stems back to about one inch once the outer skins become papery. Store the cured bulbs in a cool, dark place with 60% humidity to prevent mold and sprouting. Proper curing and storage can extend your garlic's shelf life up to several months, preserving its quality for your cooking needs.